Adding a New Donor
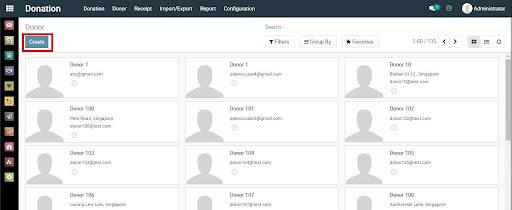
Step 1
To create a new donor, click on Create on the top left corner.

Step 2
You will be redirected to the page shown in the screenshot.
On this page, you can fill up the donor details in the corresponding fields as shown.

Step 3
You can toggle between the ‘Individual’ and ‘Company’ radio buttons to classify your donor as an individual or a company.

Step 4
[For Individual donors ONLY] The dropdown field below will ONLY be visible for donors that are classified as Individual.
This field can be used for individual donors that are tagged to or have provided a company name.
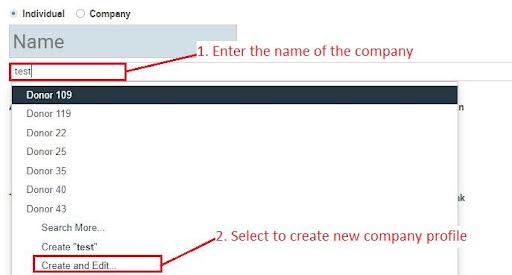
Step 5
You can select the company from the dropdown if the company has donated before or create a new company profile by simply typing the name of the company and clicking on ‘Create & Edit’.
This will launch the small pop-up shown below.
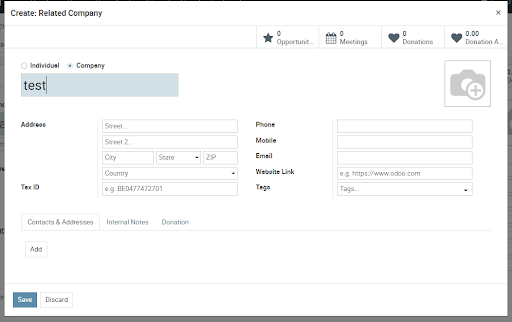
Step 6
You can enter the company details in the corresponding fields and click on ‘Save’ to confirm the changes.
Now you will be able to select the newly added company from the dropdown.
For the creation of an Individual donor

For the creation of an Company donor
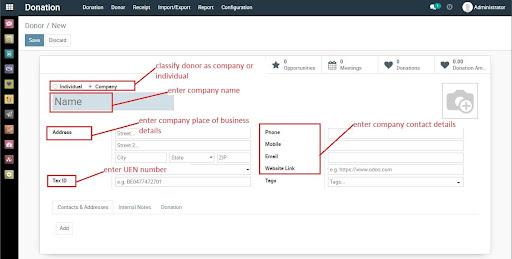

You may also notice a ‘Tags’ field under both the Individual and Company Donor Creation pages.

This field is for optional use. You can use it to assign tags to donor profiles for your own information or tracking. To create a new tag, simply type in the name of the tag and select the ‘Create’ option.

Once the tag has been created, you can select it from the dropdown, and it will appear as a color-coded tag to your donor’s profile.

Once you have filled up the relevant fields, click on ‘Save’ on the top left corner to confirm your changes. You can also click on ‘Discard’ if you do not wish to create a new donor record.
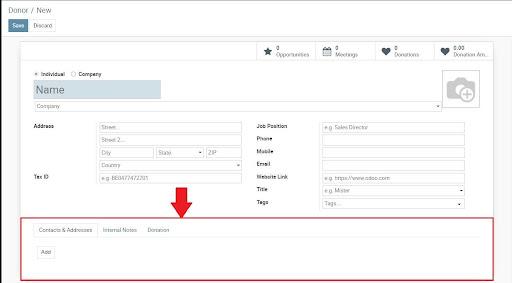
After filling up donor details, you may notice another section on the Donor Creation form.